Measuring distance with JSN-SR04T and Raspberry
Distance sensor JSN-SR04T
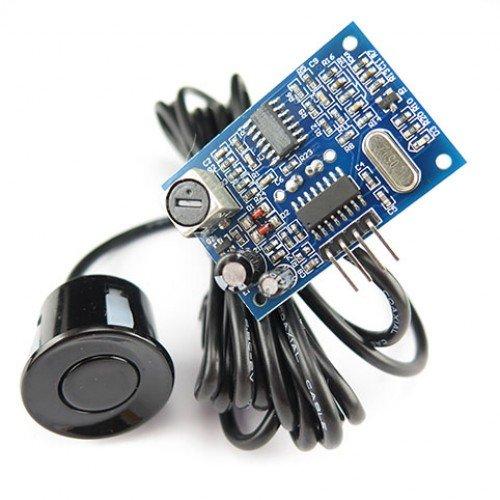
If you are in need of measuring distances with your Raspberry, this tutorial is what you where looking for. In this article, we will look at a JSN-SR04T ultrasonic distance sensor. Which is an affordable sensor for your robotics/home automation/whatever project. Its price starts on $7 on Ebay. For this price you will get a waterproof sensor, that can measure distances between 20cm to 600cm and should work in temperatures from -20°C to +70°C. It claims to have an accuracy of ±1cm, but lets be honest, there are so many things that can influence the measuring, that you will get a higher fluctuance in your measurements than that. This is how it looks like…
How to measure distance with sound
JSN-SR04T and ultrasonic distance sensor in general works on a simple principle. It sends an acoustic wave (ultrasonic, so you won’t hear it) when it is triggered and then listens for when the wave reflects from some obstacle in front of it and comes back. However, the sensor is only able to send the wave and tell that a wave came back, you will have to do the math to count the distance by yourself (read, you will have to program it by yourself). But read further and you will see it is really easy.
From the sensor specification we can find out that the sensor is activated by sending a pulse of HIGH, which is at least 10µs (microseconds) long, on the TRIGGER pinout. Which means that if you want to send a wave, you will need to have a GPIO set to OUTPUT mode, connect it to the TRIGGER pinout and have it set to LOW, then set in to HIGHT for at least 10µs and then set it back to LOW. Shortly after this pulse is received by the sensor (TRIGGER goes from HIGHT back to LOW), the ECHO pinout will go HIGH and the sensor will send a wave at the same time. The ECHO pinout will remain in HIGH position until it receives the wave back, at that moment the ECHO will go back to LOW. Therefore you will need one more GPIO set to INPUT mode and connect it to the ECHO pinout. Then in your program, you will have to wait until it goes HIGHT, then start counting, wait until it goes back to LOW as it received the wave back and then stop the counting. The time you measure is the time a sound wave spend going to the obstacle and back to the sensor.
Thanks to many clever minds who did research on speed of sound we now know, that it travels around 332 meters per second at 20°C, keep in mind that it slightly changes with different air temperature. To be more precise, use this equation to count the speed for your conditions (it assumes the air humidity is 0% and that temperature is in °C):
speedOfSound = (331.3 + 0.606 * temperature) m/s
To tell the distance we only need to multiply the speed of sound with the measured time and divide it by two. That is because the sound wave had to go the distance twice - to the obstacle and back to the sensor. And viola! We have measured the distance! Now lets go connect the sensor to the Raspberry and write a program to count the distances for us…
Connecting it to Raspberry
JSN-SR04T sensor has four pinouts. First pair is VCC and GND for obvious purpose of connecting it to 5V power and grounding it. And the second pair is TRIGGER and ECHO that we already mentioned in previous section. So simply connect the VCC to 5V, GND to GND, ECHO to a GPIO & TRIGGER to different GPIO. Simple.
Reading the distance
Now lets create a file called distance.py and write the actual code:
#!/usr/bin/python

# Import required Python libraries
import time               # library for time reading time
import RPi.GPIO as GPIO   # library to control Rpi GPIOs

def main():
  # We will be using the BCM GPIO numbering
  GPIO.setmode(GPIO.BCM)

  # Select which GPIOs you will use
  GPIO_TRIGGER = 23
  GPIO_ECHO    = 24

  # Set TRIGGER to OUTPUT mode
  GPIO.setup(GPIO_TRIGGER,GPIO.OUT)
  # Set ECHO to INPUT mode
  GPIO.setup(GPIO_ECHO,GPIO.IN)

  # Set TRIGGER to LOW
  GPIO.output(GPIO_TRIGGER, False)

  # Let the sensor settle for a while
  time.sleep(0.5)

  # Send 10 microsecond pulse to TRIGGER
  GPIO.output(GPIO_TRIGGER, True) # set TRIGGER to HIGH
  time.sleep(0.00001) # wait 10 microseconds
  GPIO.output(GPIO_TRIGGER, False) # set TRIGGER back to LOW

  # Create variable start and give it current time
  start = time.time()
  # Refresh start value until the ECHO goes HIGH = until the wave is send
  while GPIO.input(GPIO_ECHO)==0:
    start = time.time()
  # Assign the actual time to stop variable until the ECHO goes back from HIGH to LOW
  while GPIO.input(GPIO_ECHO)==1:
    stop = time.time()

  # Calculate the time it took the wave to travel there and back
  measuredTime = stop - start
  # Calculate the travel distance by multiplying the measured time by speed of sound
  distanceBothWays = measuredTime * 33112 # cm/s in 20 degrees Celsius
  # Divide the distance by 2 to get the actual distance from sensor to obstacle
  distance = distanceBothWays / 2
  # Print the distance
  print("Distance : {0:5.1f}cm".format(distance))

  # Reset GPIO settings
  GPIO.cleanup()

# Run the main function when the script is executed
if __name__ == "__main__":
    main()
You can get the code also from my GitLab or just clone the repo to your Raspberry.
git clone https://gitlab.com/bambusekd-dev-blog/raspberry-measure-distance-jsn-sr04t.git
Once you have the code ready, fire up your terminal on Raspberry, navigate to the folder with your script, point the sensor somewhere and run the script.
python distance.py
If everything worked as it should, you should see message similar to this in your terminal:
Distance : 25.1cm
Good job, you have successfully measured a distance between an obstacle and your sensor!
Some last thoughts
You should always bare in mind, that this sensor has limited capabilities. You have to setup it properly, make sure it points to the place whose distance you desire to measure and also that the speed of sound differs in different temperature/humidity. Also Python’s time library is not the best tool for precise time measurement. For greater precision, I would recommend to use a C program rather than Python. But worry not, if you can tolerate some inaccuracy, then there is no problem using Python and the code provided above. Happy hacking!